Creating and sending your first campaign
In the AI PR Toolkit, you can create and send personalized PR pitches to your chosen media. You can start from scratch, draft an email and a press release with AI, or summarize an existing press release into an email. Here's how it works:
1. Start a new email
- Go to Your Emails from the left-hand menu.
- Click Create email in the top right corner.
- Click Write next to Email body to open the editor.

2. Choose how you want to write
You can start writing your message manually or use the AI Assistant on the right-hand side to help you draft your story.

Click Get started and select one of the available options:
- Use published press release – Paste a link to your press release or upload a PDF to generate a draft email
- Use key message – Provide 2–3 bullet points and let AI build the pitch around them
- Use a pitch template, such as:
- Research findings
- Expert comment
- Interview opportunity
Then click Let’s go to generate a first draft. You can edit and personalize it before sending.
3. Create your email in one of three ways
Generate a pitch with AI (based on key messages)
- In the right-hand panel, choose Use key message
- Enter 2–3 bullet points summarizing the news or story you want to pitch
- Add optional keywords for context, choose your preferred language and tone of voice
- Click Generate 3 story angles to get suggestions with explanations
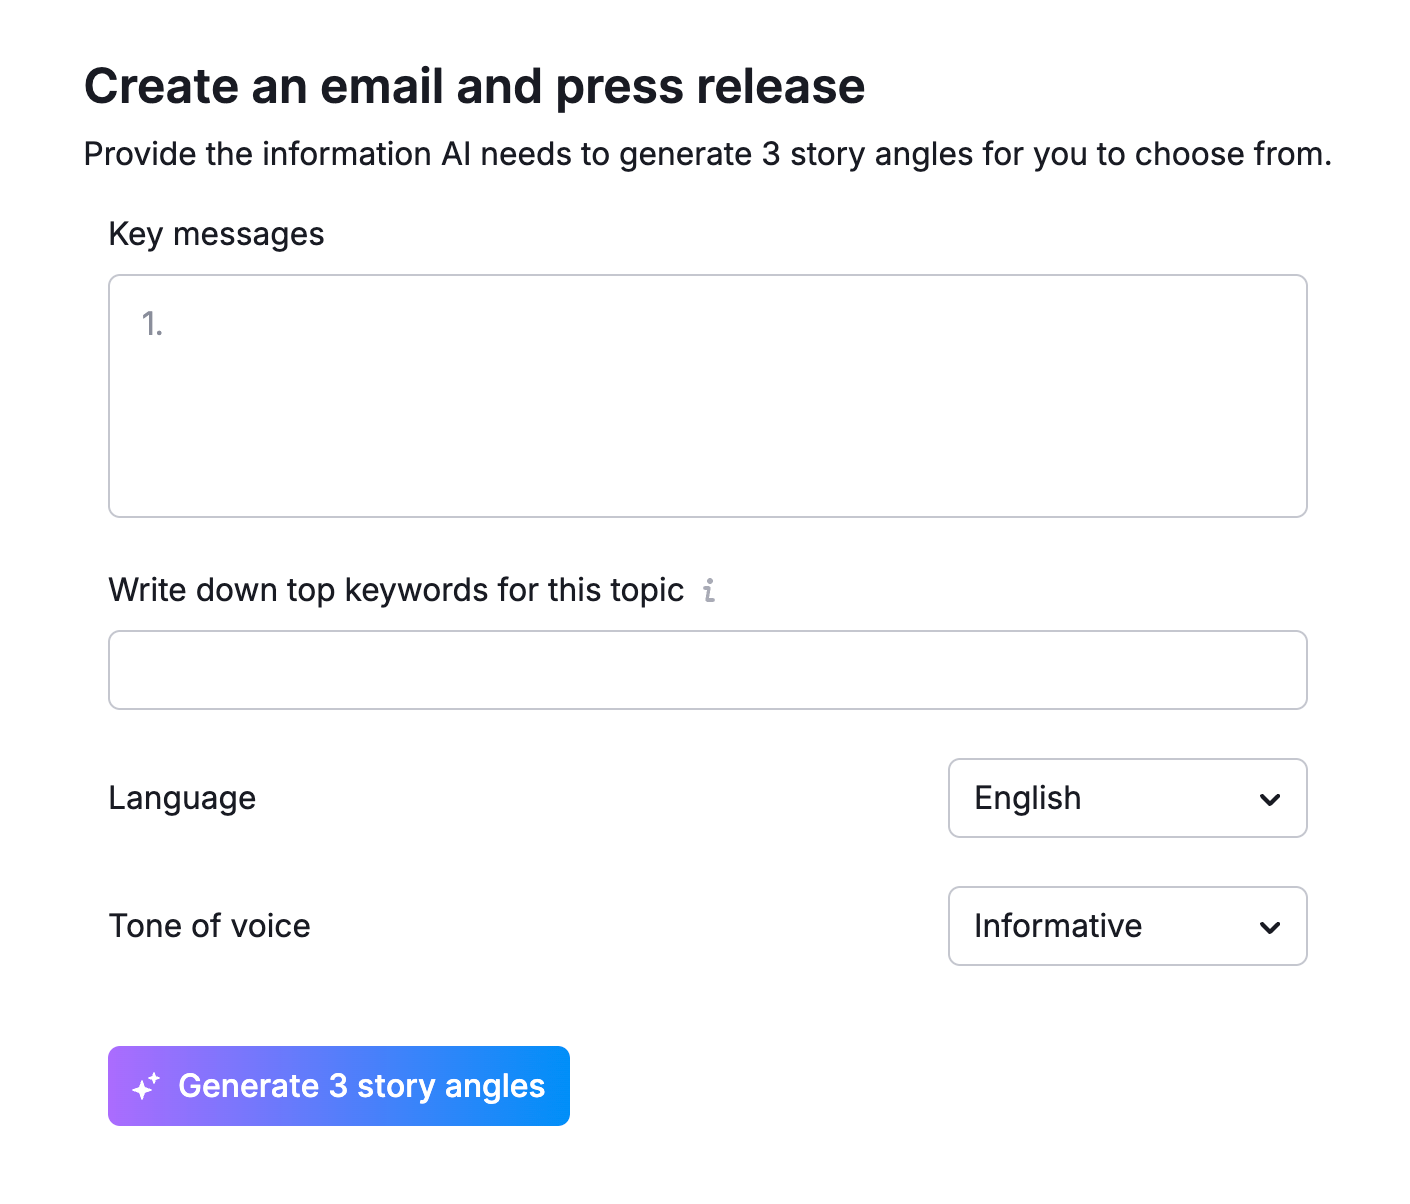
- Select the one that fits your story and click Draft this pitch
AI will generate a full email draft and press release. You can personalize it by editing content, adding visuals, and using personalization tokens.
Want a new version? Click Update input to adjust your key messages or tone and regenerate.

Turn an existing press release into a pitch
If you already have a press release, you can quickly turn it into a PR pitch.
- Select Use published press release in the assistant panel
- Paste a URL or upload a PDF of your press release
- Click Draft your pitch

The editor will auto-fill with content based on your release.
You can adjust tone or language from the right-hand panel and click Regenerate to rewrite the message. Your previous message will be replaced.

After you make your edits, you can save that email as a draft, send a test email to yourself, or click Next to review the final details before sending it out.
Write your pitch from scratch

After drafting your pitch, you’ll see tips in the Improvements section to refine your message.
This tool checks for:
- Spam trigger words and broken links – to help improve deliverability and reduce the risk of landing in spam folders.
- Personalization tokens and missing fallback text – to make your pitch more tailored and prevent blank fields in the final message.
Apply or skip them to finalize your content.
You can also click Get started to let AI draft your story.
3. Review and send or schedule your message
Once your pitch is ready, you’ll see a checklist to complete the email setup:
- Recipients – Choose who should receive your email.
- Subject – Create an attention-grabbing subject line and preview text with AI or manually.
- Sender – Select the sender's name and email.
- Send or schedule – Send now or schedule your campaign for later.

Each incomplete step will have a “To do” label. Once everything’s ready, you can click Send email/Schedule email (depending on what send time you set), Send test email, or Save draft to finish it later.

Adding personalization, attachments, and signatures
When creating a pitch in AI PR Toolkit, you can add personalization tokens, attachments, and signatures to customize and enrich your message.
Adding personalization tokens
Personalization tokens let you automatically fill in contact details from your media list. To insert one:
- Click Personalize in the editor toolbar.
- Choose a token from the dropdown.
- Optionally, add fallback text (e.g., if the field is empty).

Available tokens:
- Full Name
- First Name
- Last Name
- Outlet Name
- Role
- Greeting
- Address
- City
- Country
- Zip code
Example:
Hi {{First Name}} → becomes Hi John if the first name is available.
Adding attachments
To attach supporting materials to your email:
- Click the paperclip icon in the toolbar.
- Click Attach file and choose the files you want to upload from your device.
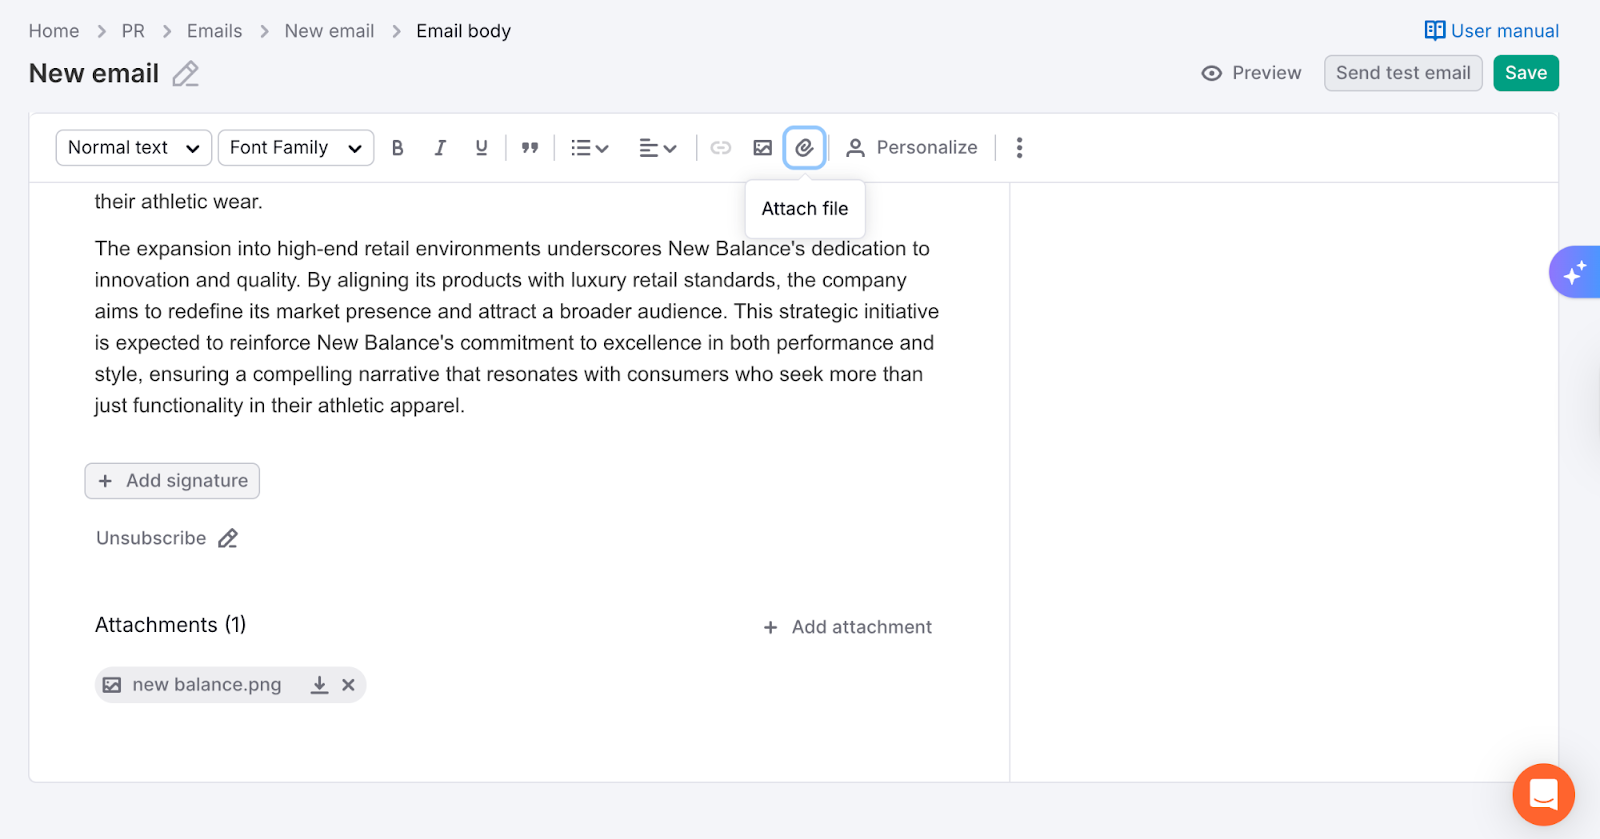
You can add up to 20 attachments, each up to 300 MB in size.
Supported file types:
- Documents: PDF, DOCX
- Images: JPG, PNG
- Videos: MP4
- ZIP files
You can also upload your press release as a PDF or DOCX attachment.
Adding a signature
To include your contact details at the end of the email:
- Click + Add Signature below the editor.
- Choose from your saved signatures or create a new one.

You can store and reuse multiple signatures, which is useful if you send emails from different people or departments.
